I have been asked if I could share my pattern for our Dragon Costumes. I have been sick for the past 3 weeks, with sick kids at home too, which is… very tiresome, since I don’t really have time to let my own body rest properly. So I didn’t get to do any fancy pdf files or anything such. If I ever get to do a proper pattern, I will update this post!
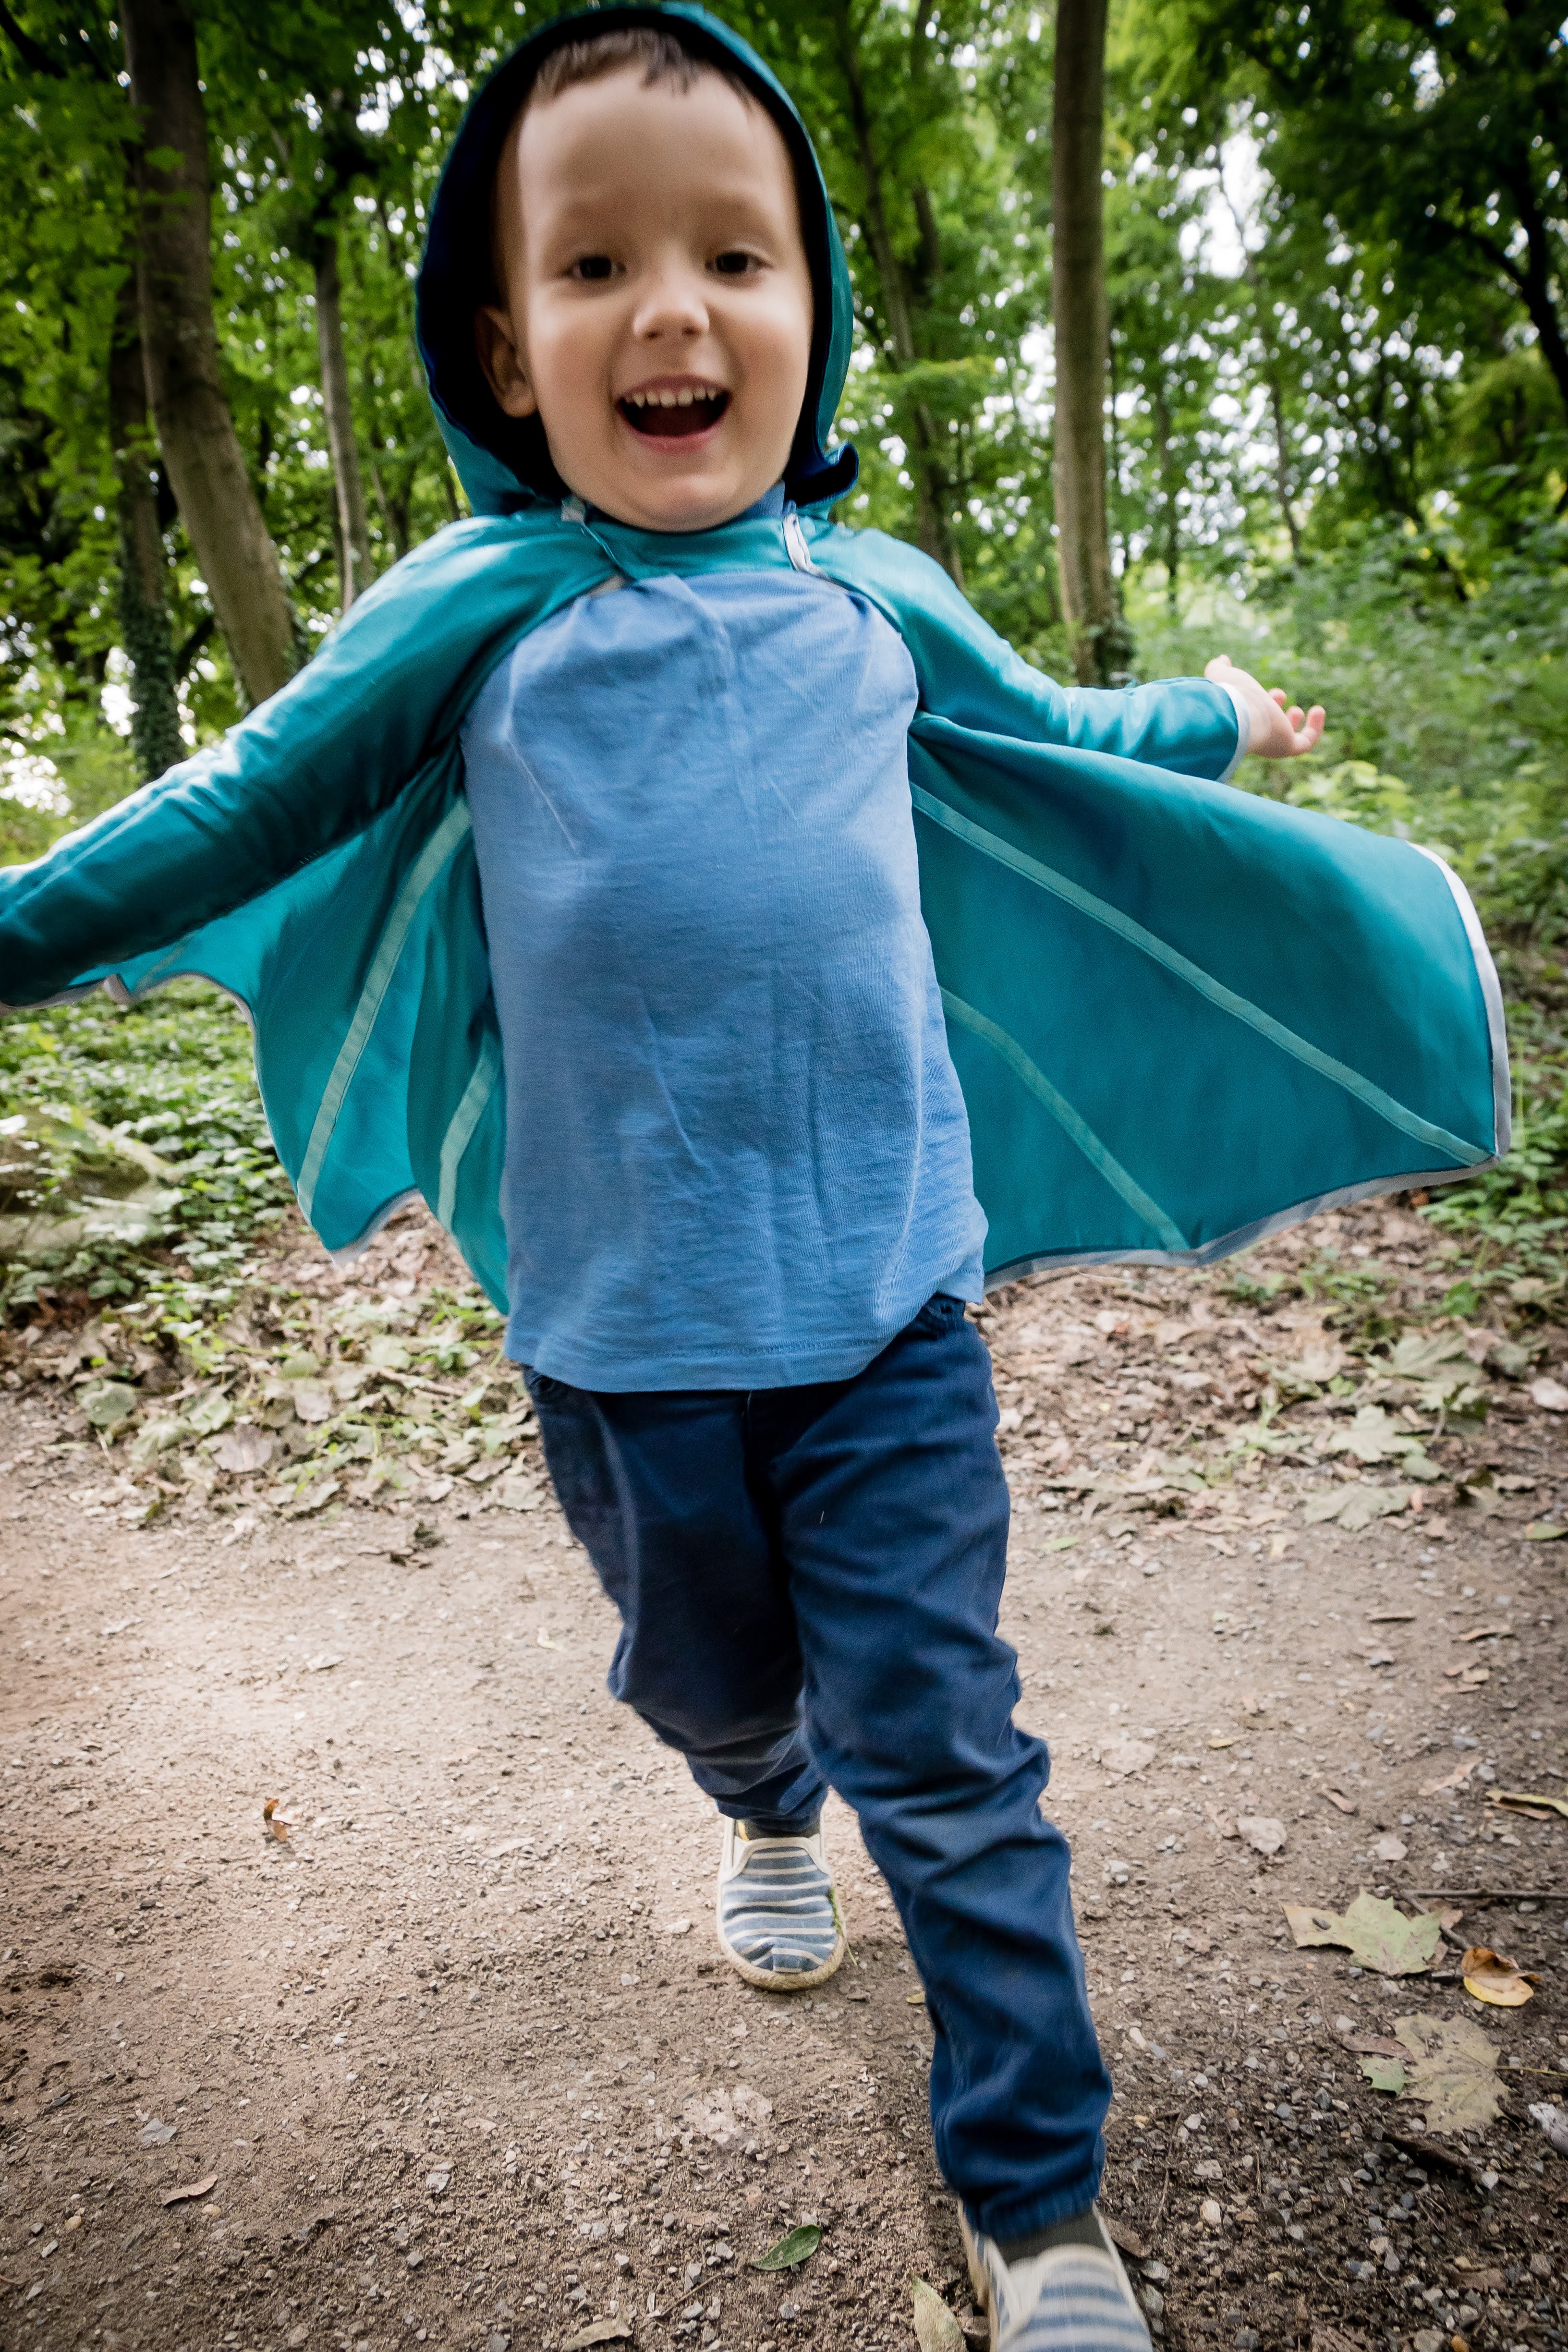
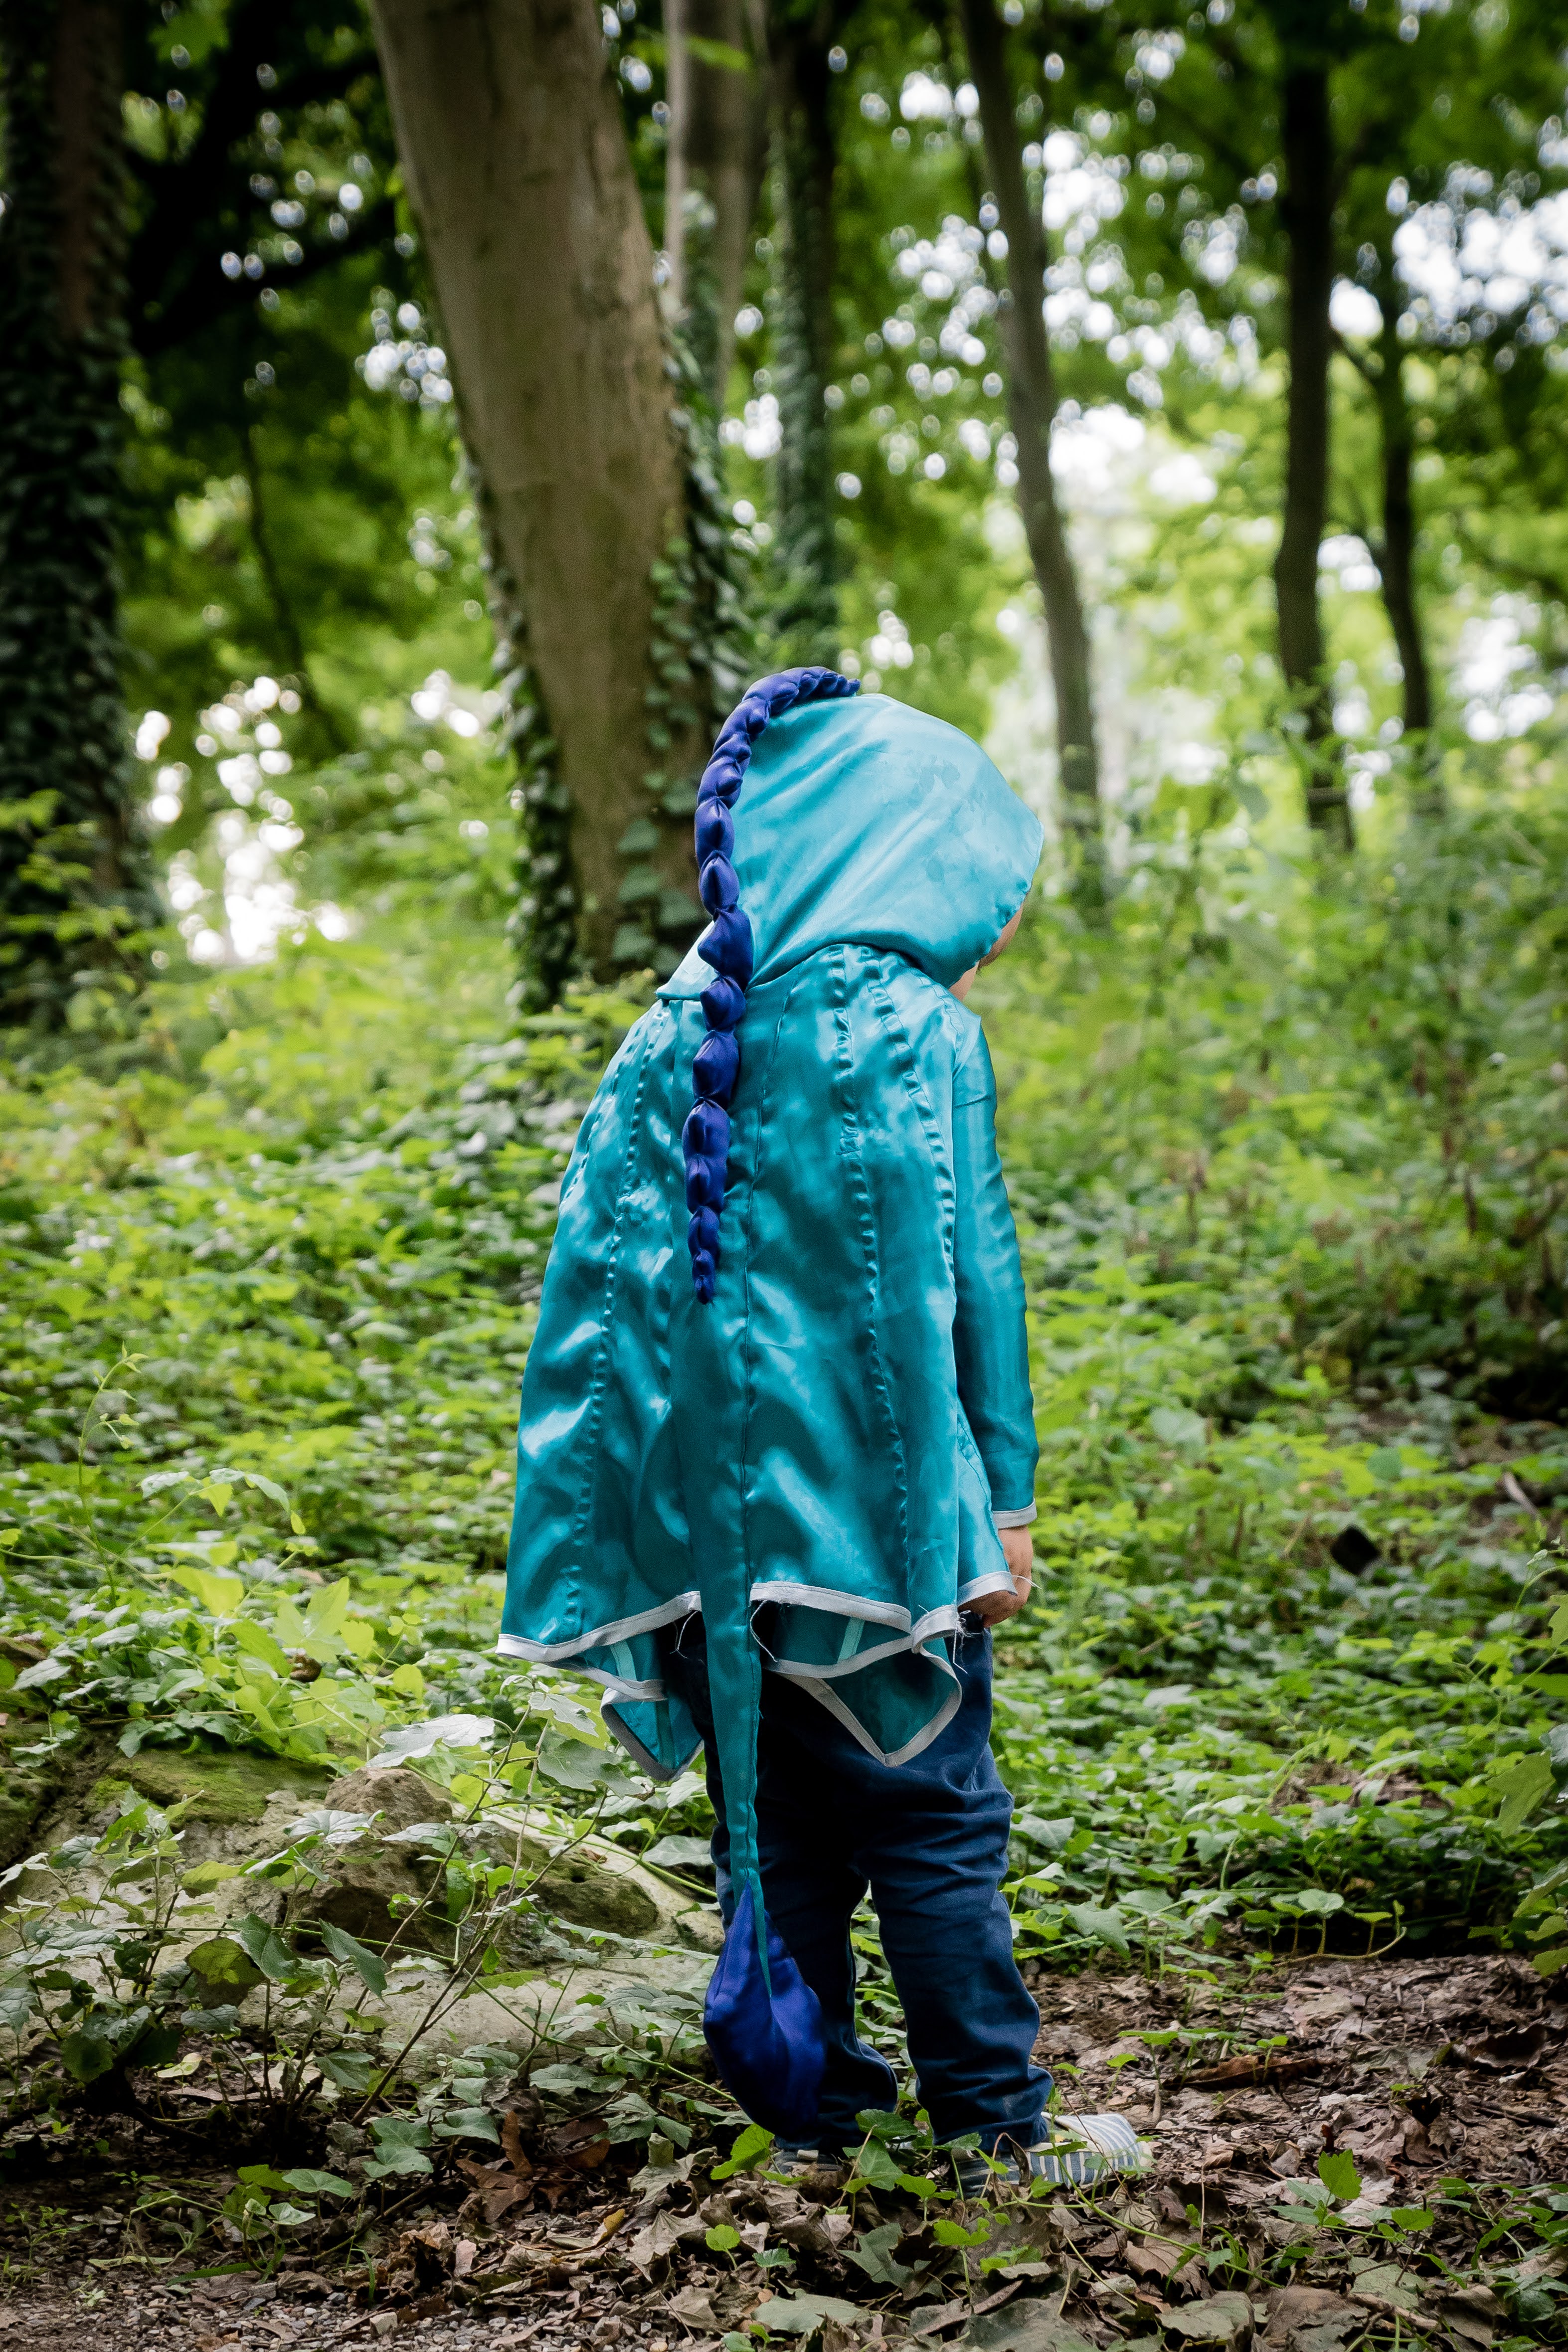
(In case you don’t know what I am talking about, this is the original post about these dragon costumes, with more -good- photos)

For now, as I see our Dragon costumes are by far the most visited post, I will hope that a simple scheme will help those that would like to make it themselves. I will be making new costumes soon, so I will try to make a proper tutorial with it.
So anyways. Here are some not-so-fancy-but-hopefully-helpful views and tips how I made our costumes.

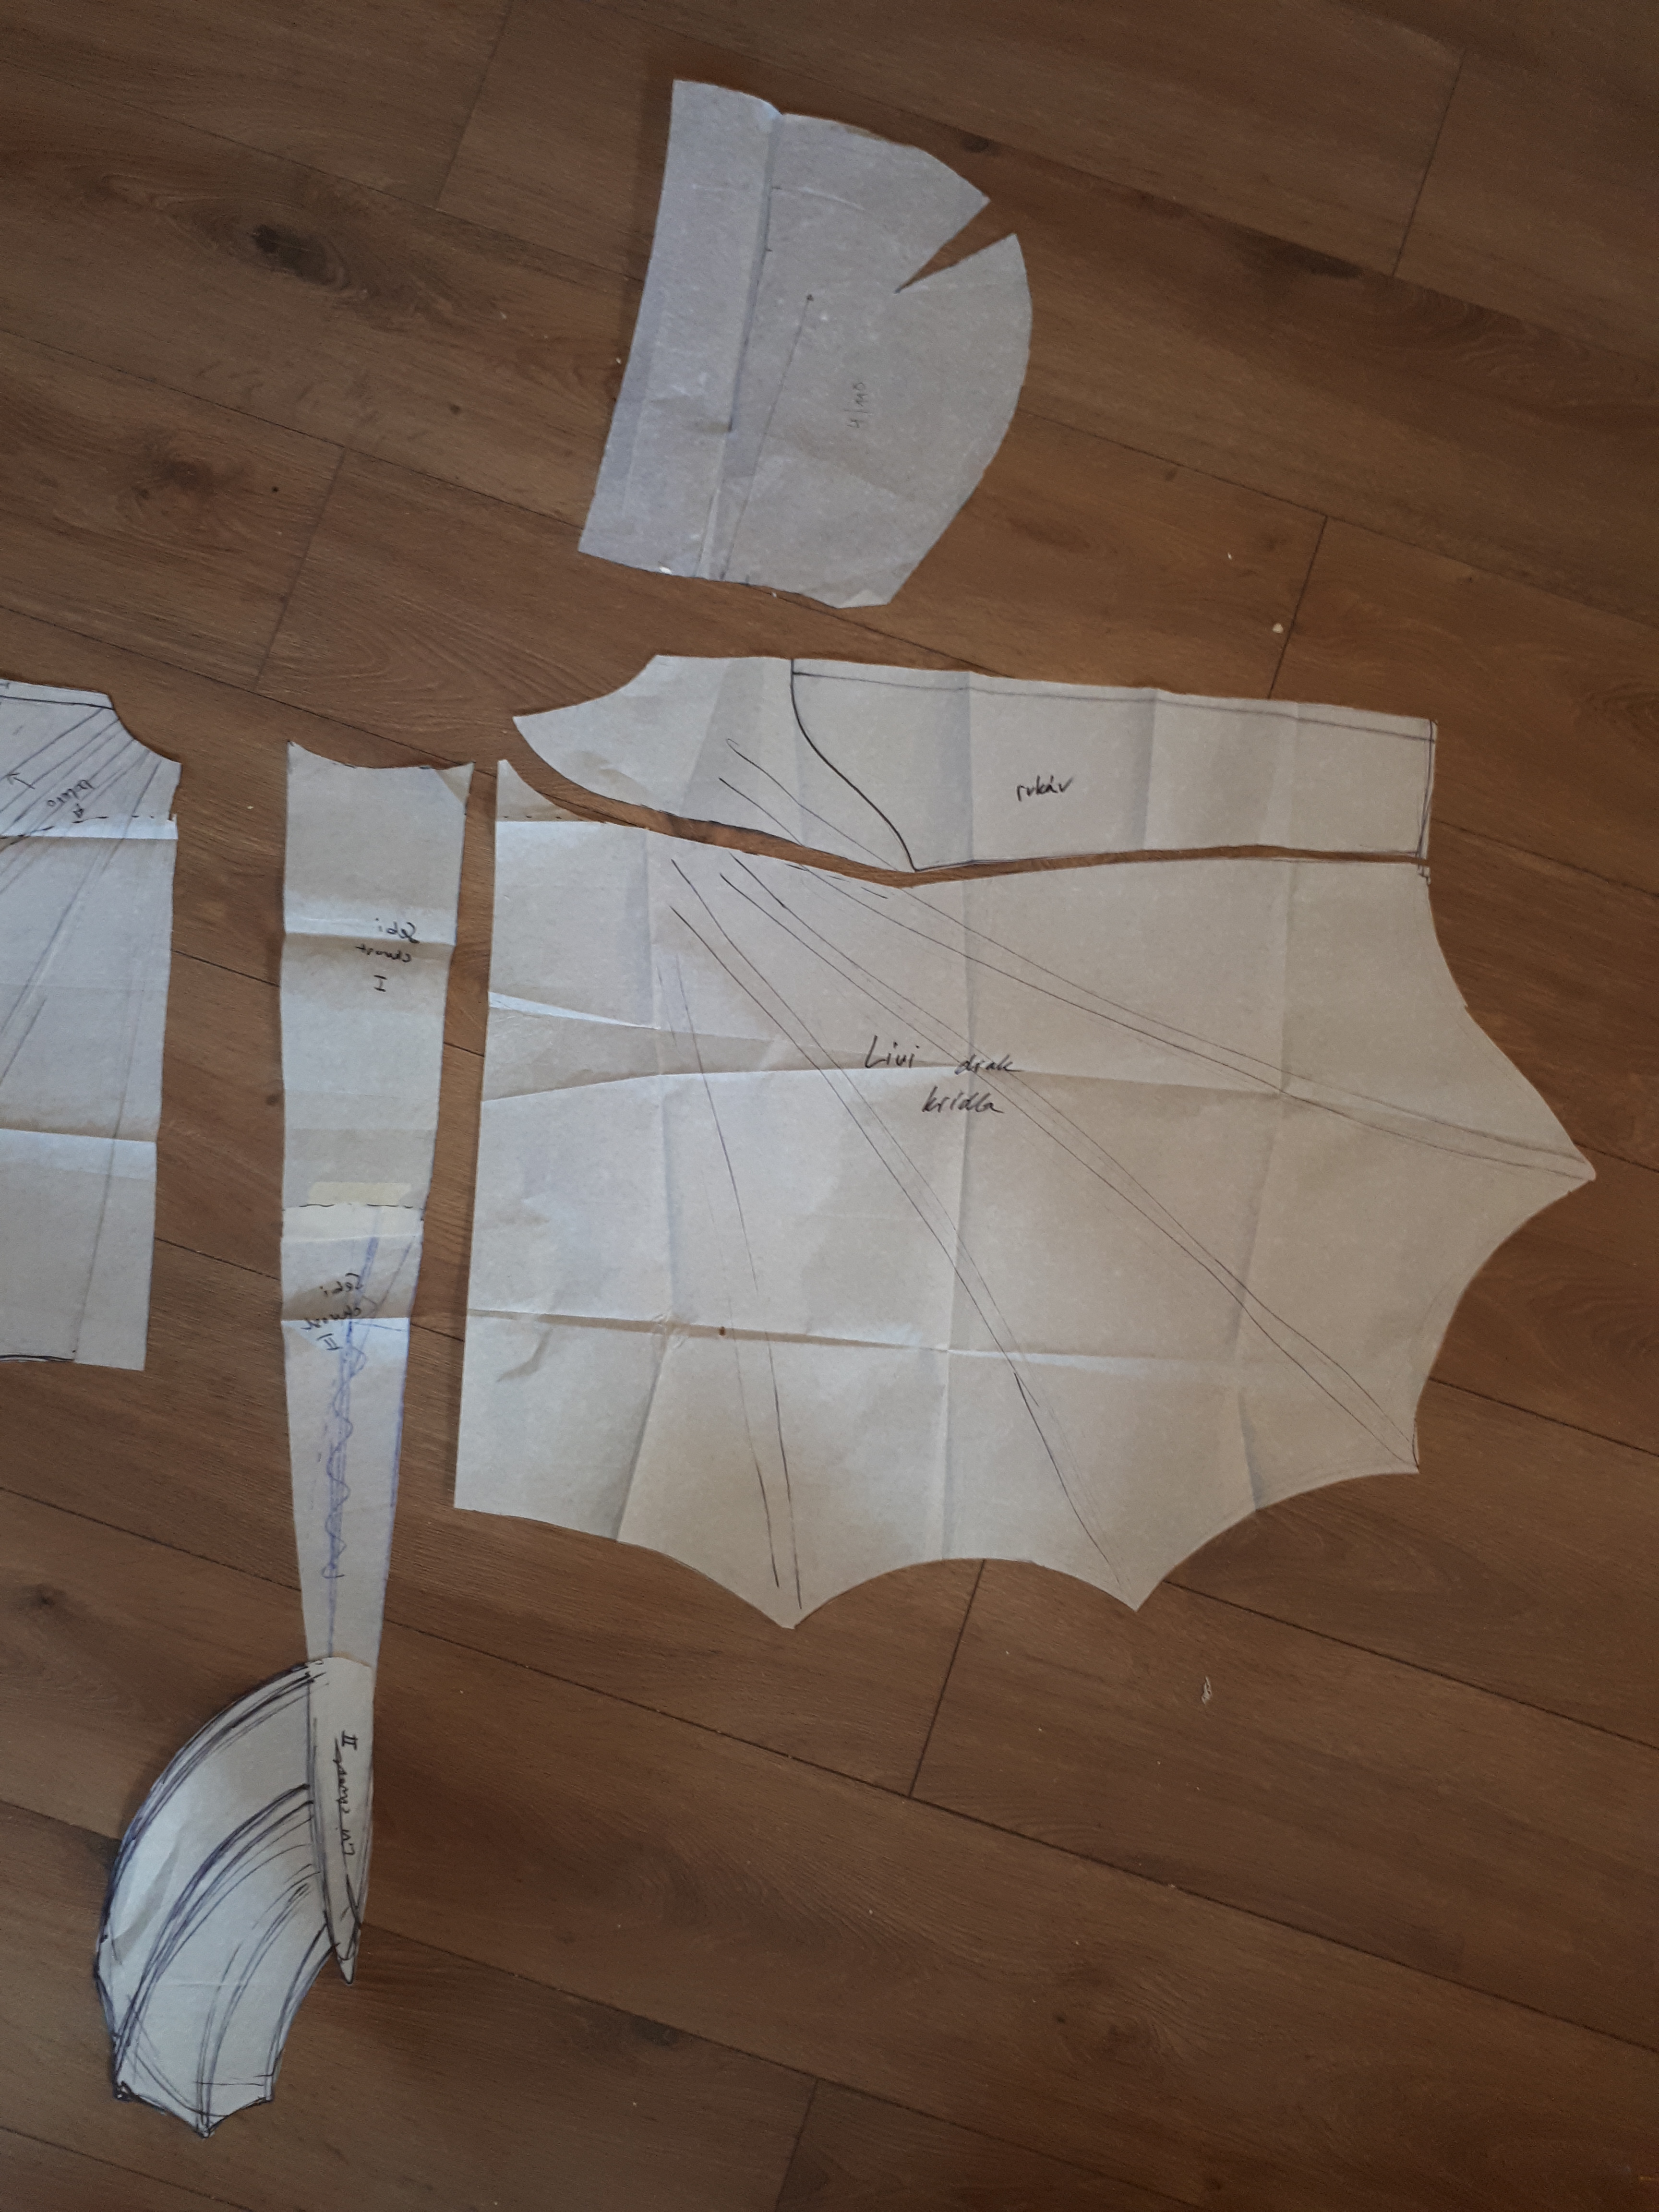
First of, I took a pattern for a long sleeve for my kids in their actual size. If you don’t have any patterns, you can just take any shirt your kids have at home and just draft around the sleeve of a long shirt of your kids. Only one half of the sleeve is needed!
You can however make it longer going over the chest, to add closure in the front here. I’ve tried rubber bands or a cross-closing over the chest with closure on the back. But this way was most popular, at least with my kids.
This would be a bit in the way going in front of the neck and that can give the kids a bit of a choking feeling…
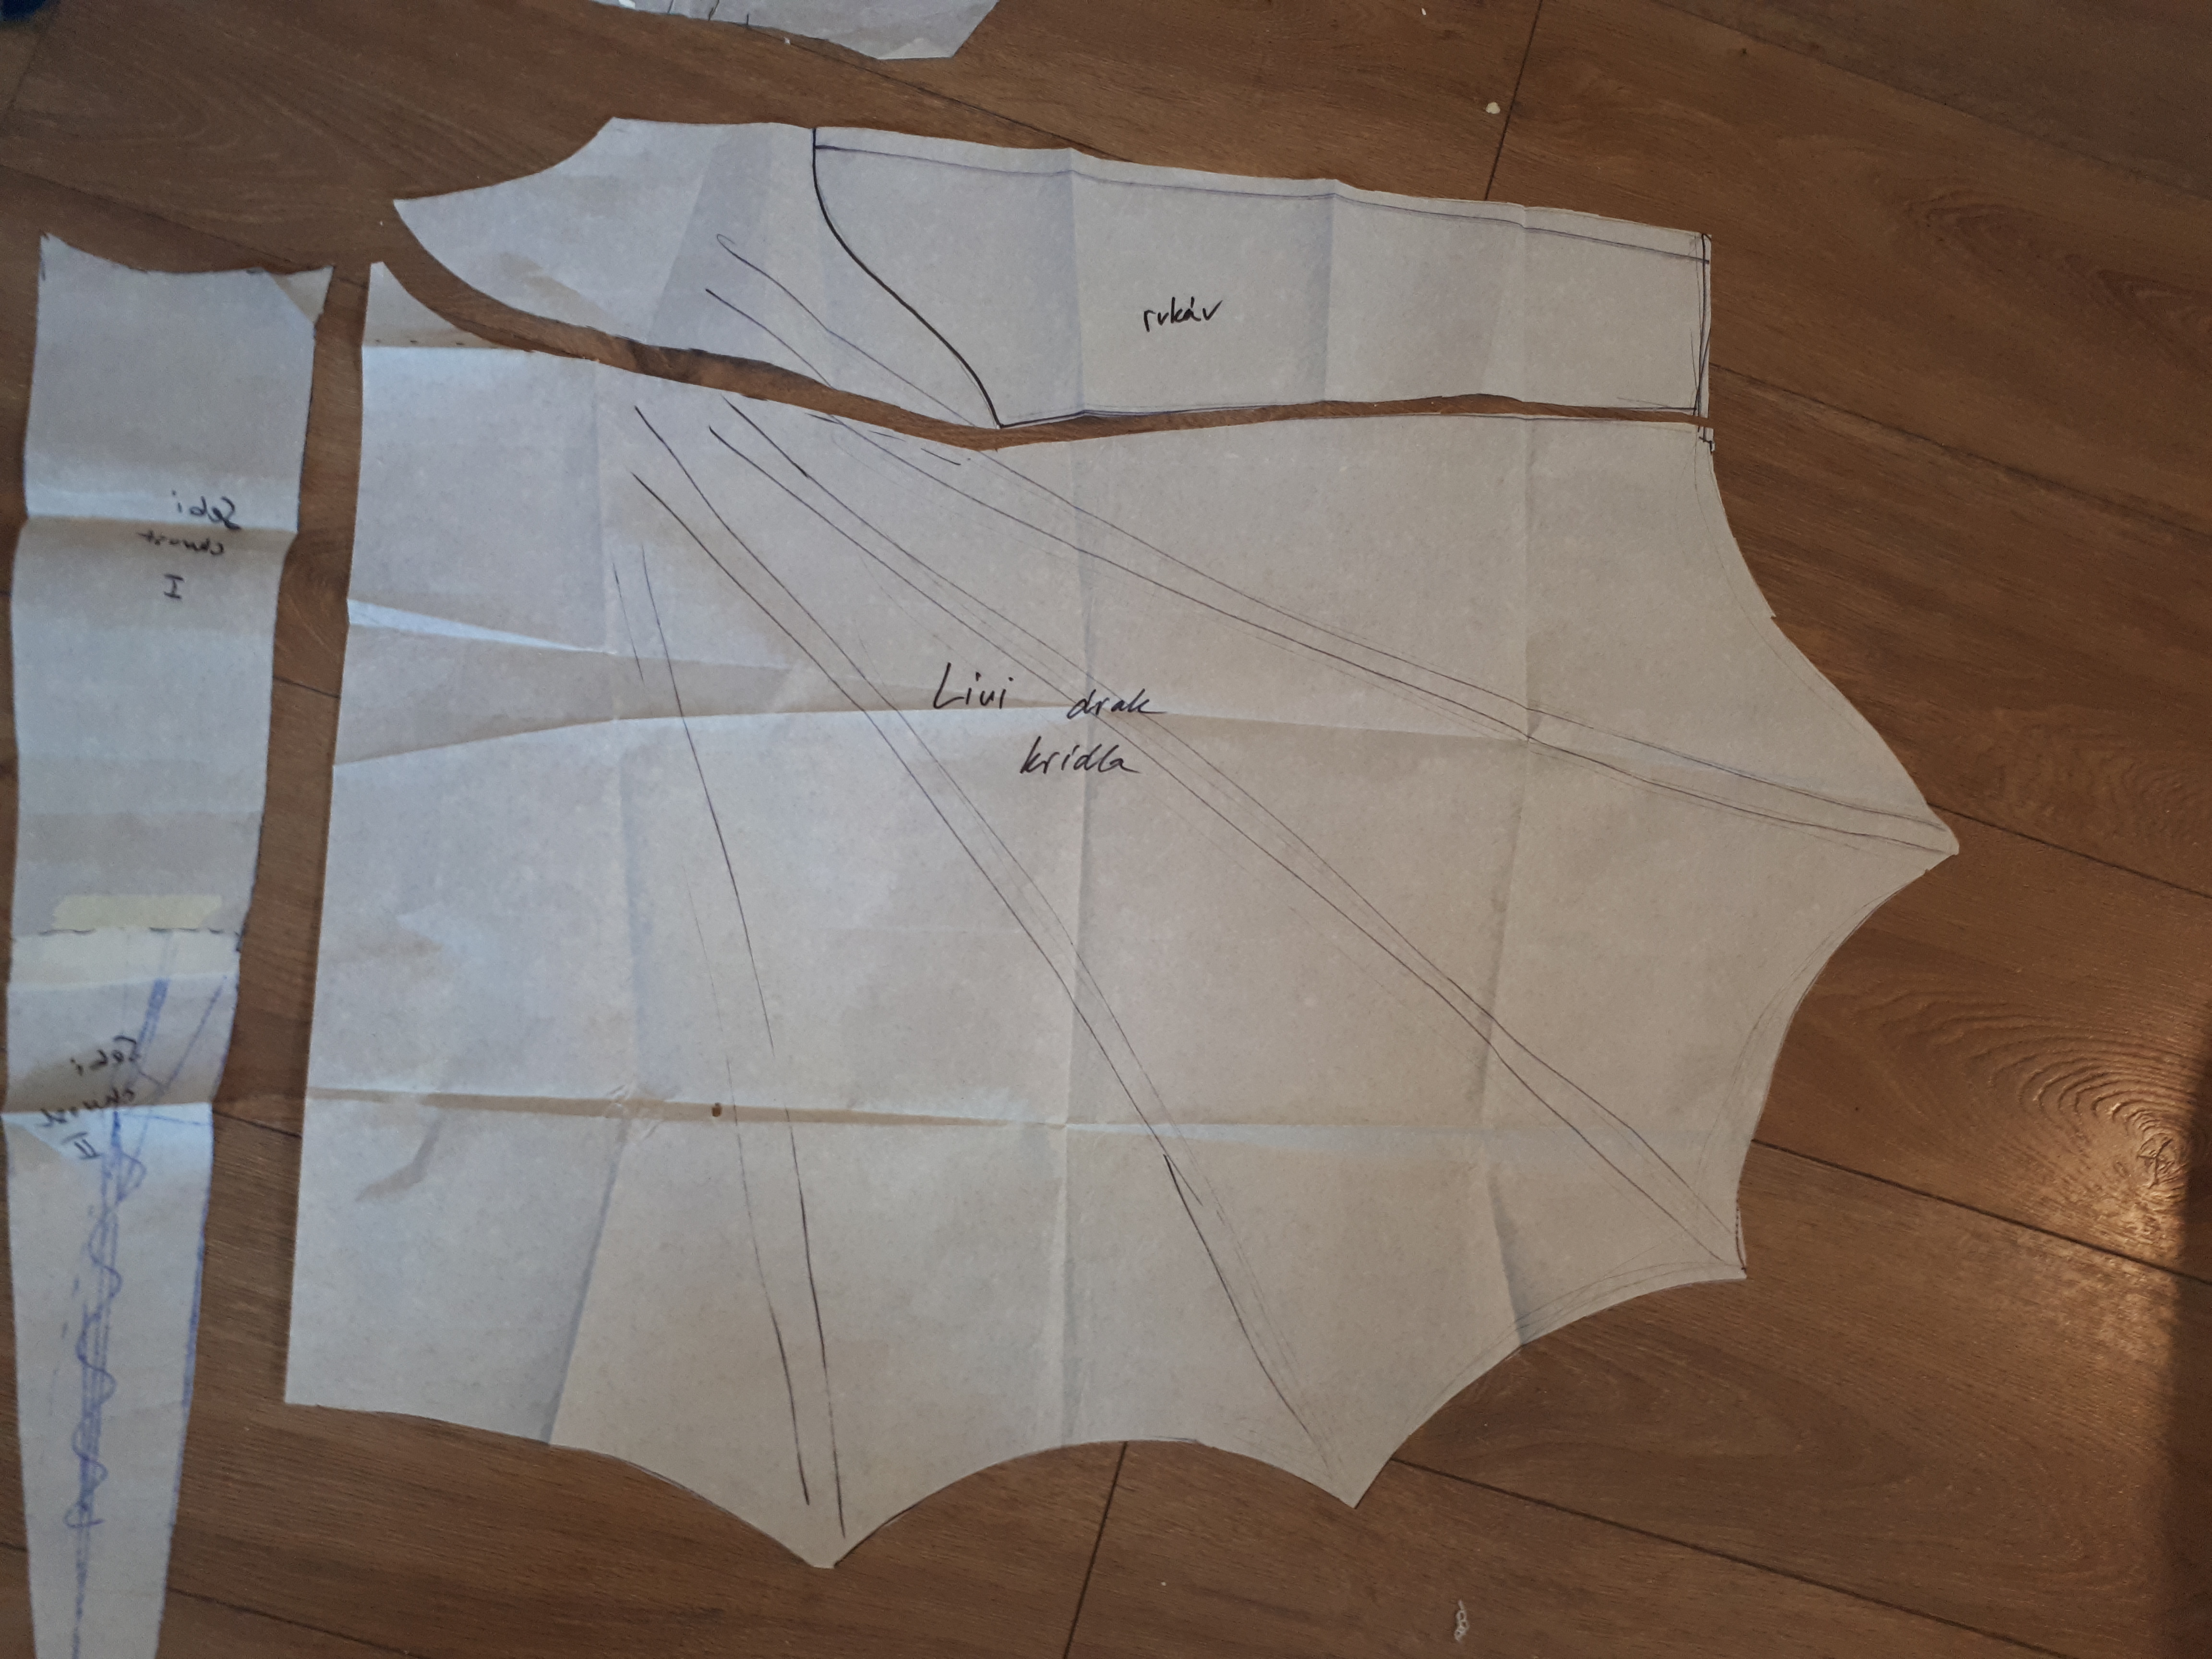
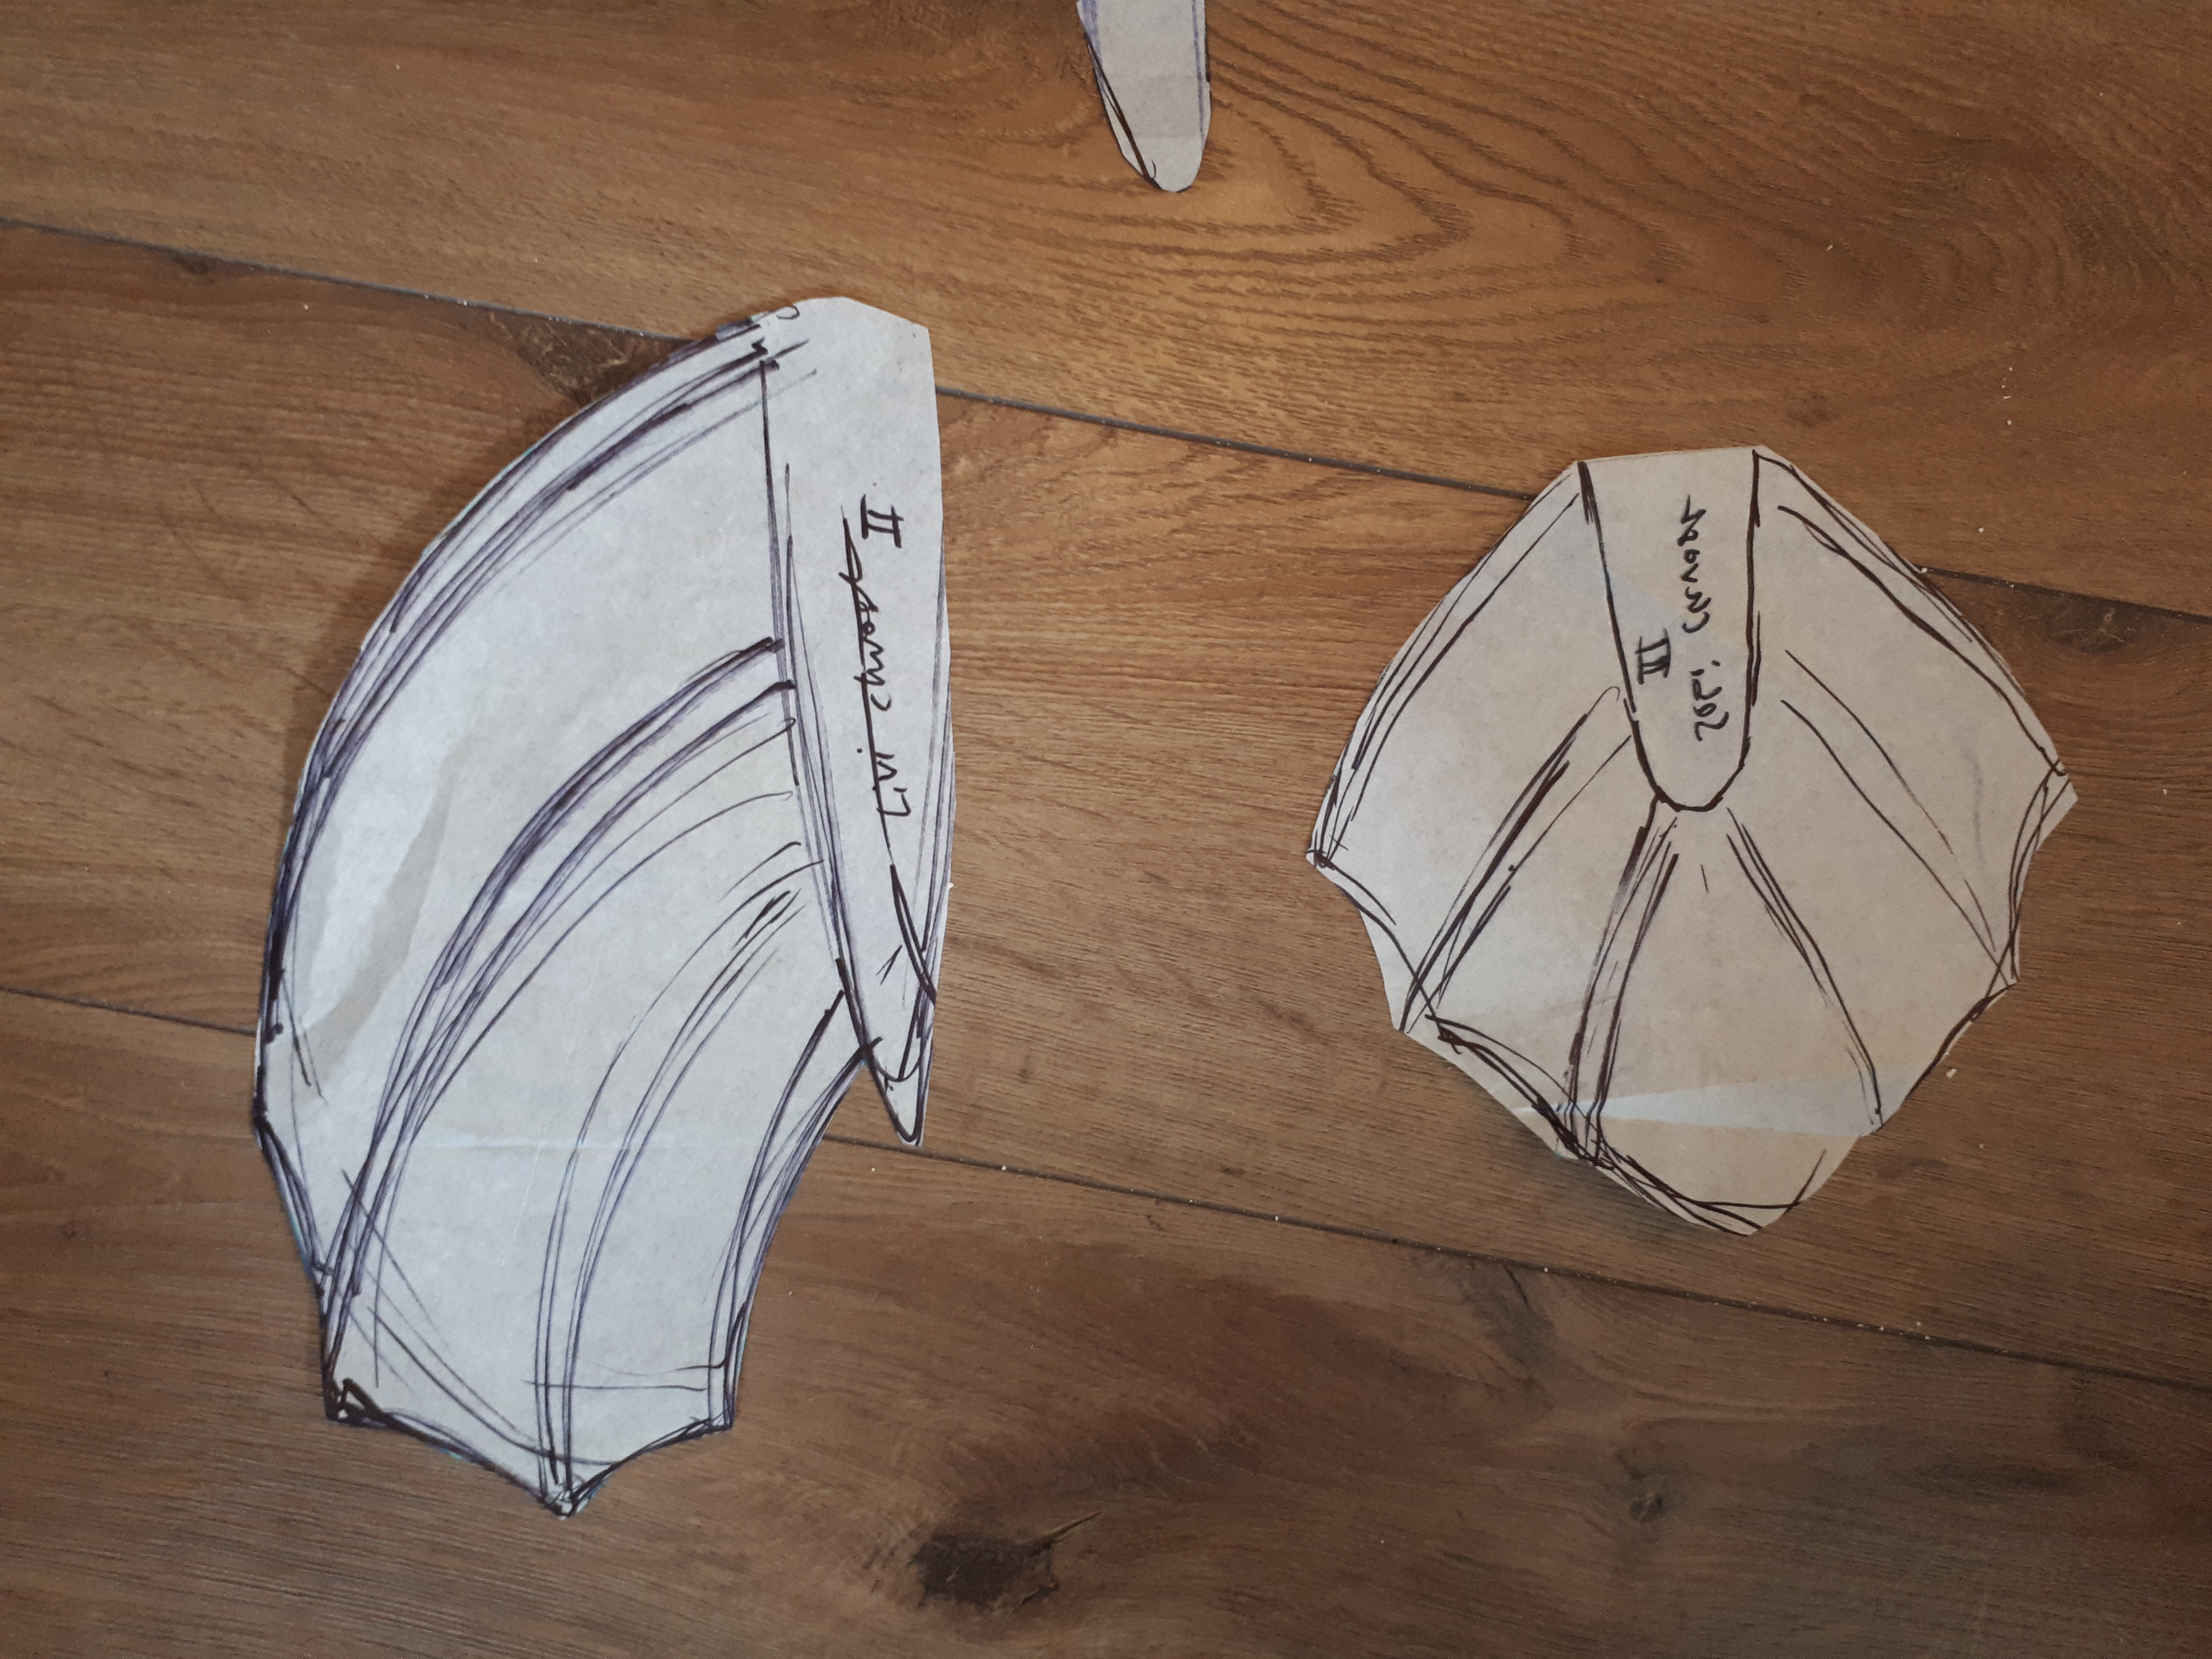
Then, since we have that shirt with long sleeves at hand, you can just take that shirt to help you with sizing your costume. I would put it on my pattern-paper, draft the whole shirt, and then draw on it the desired length of the tail and wings. Cut the pieces out.
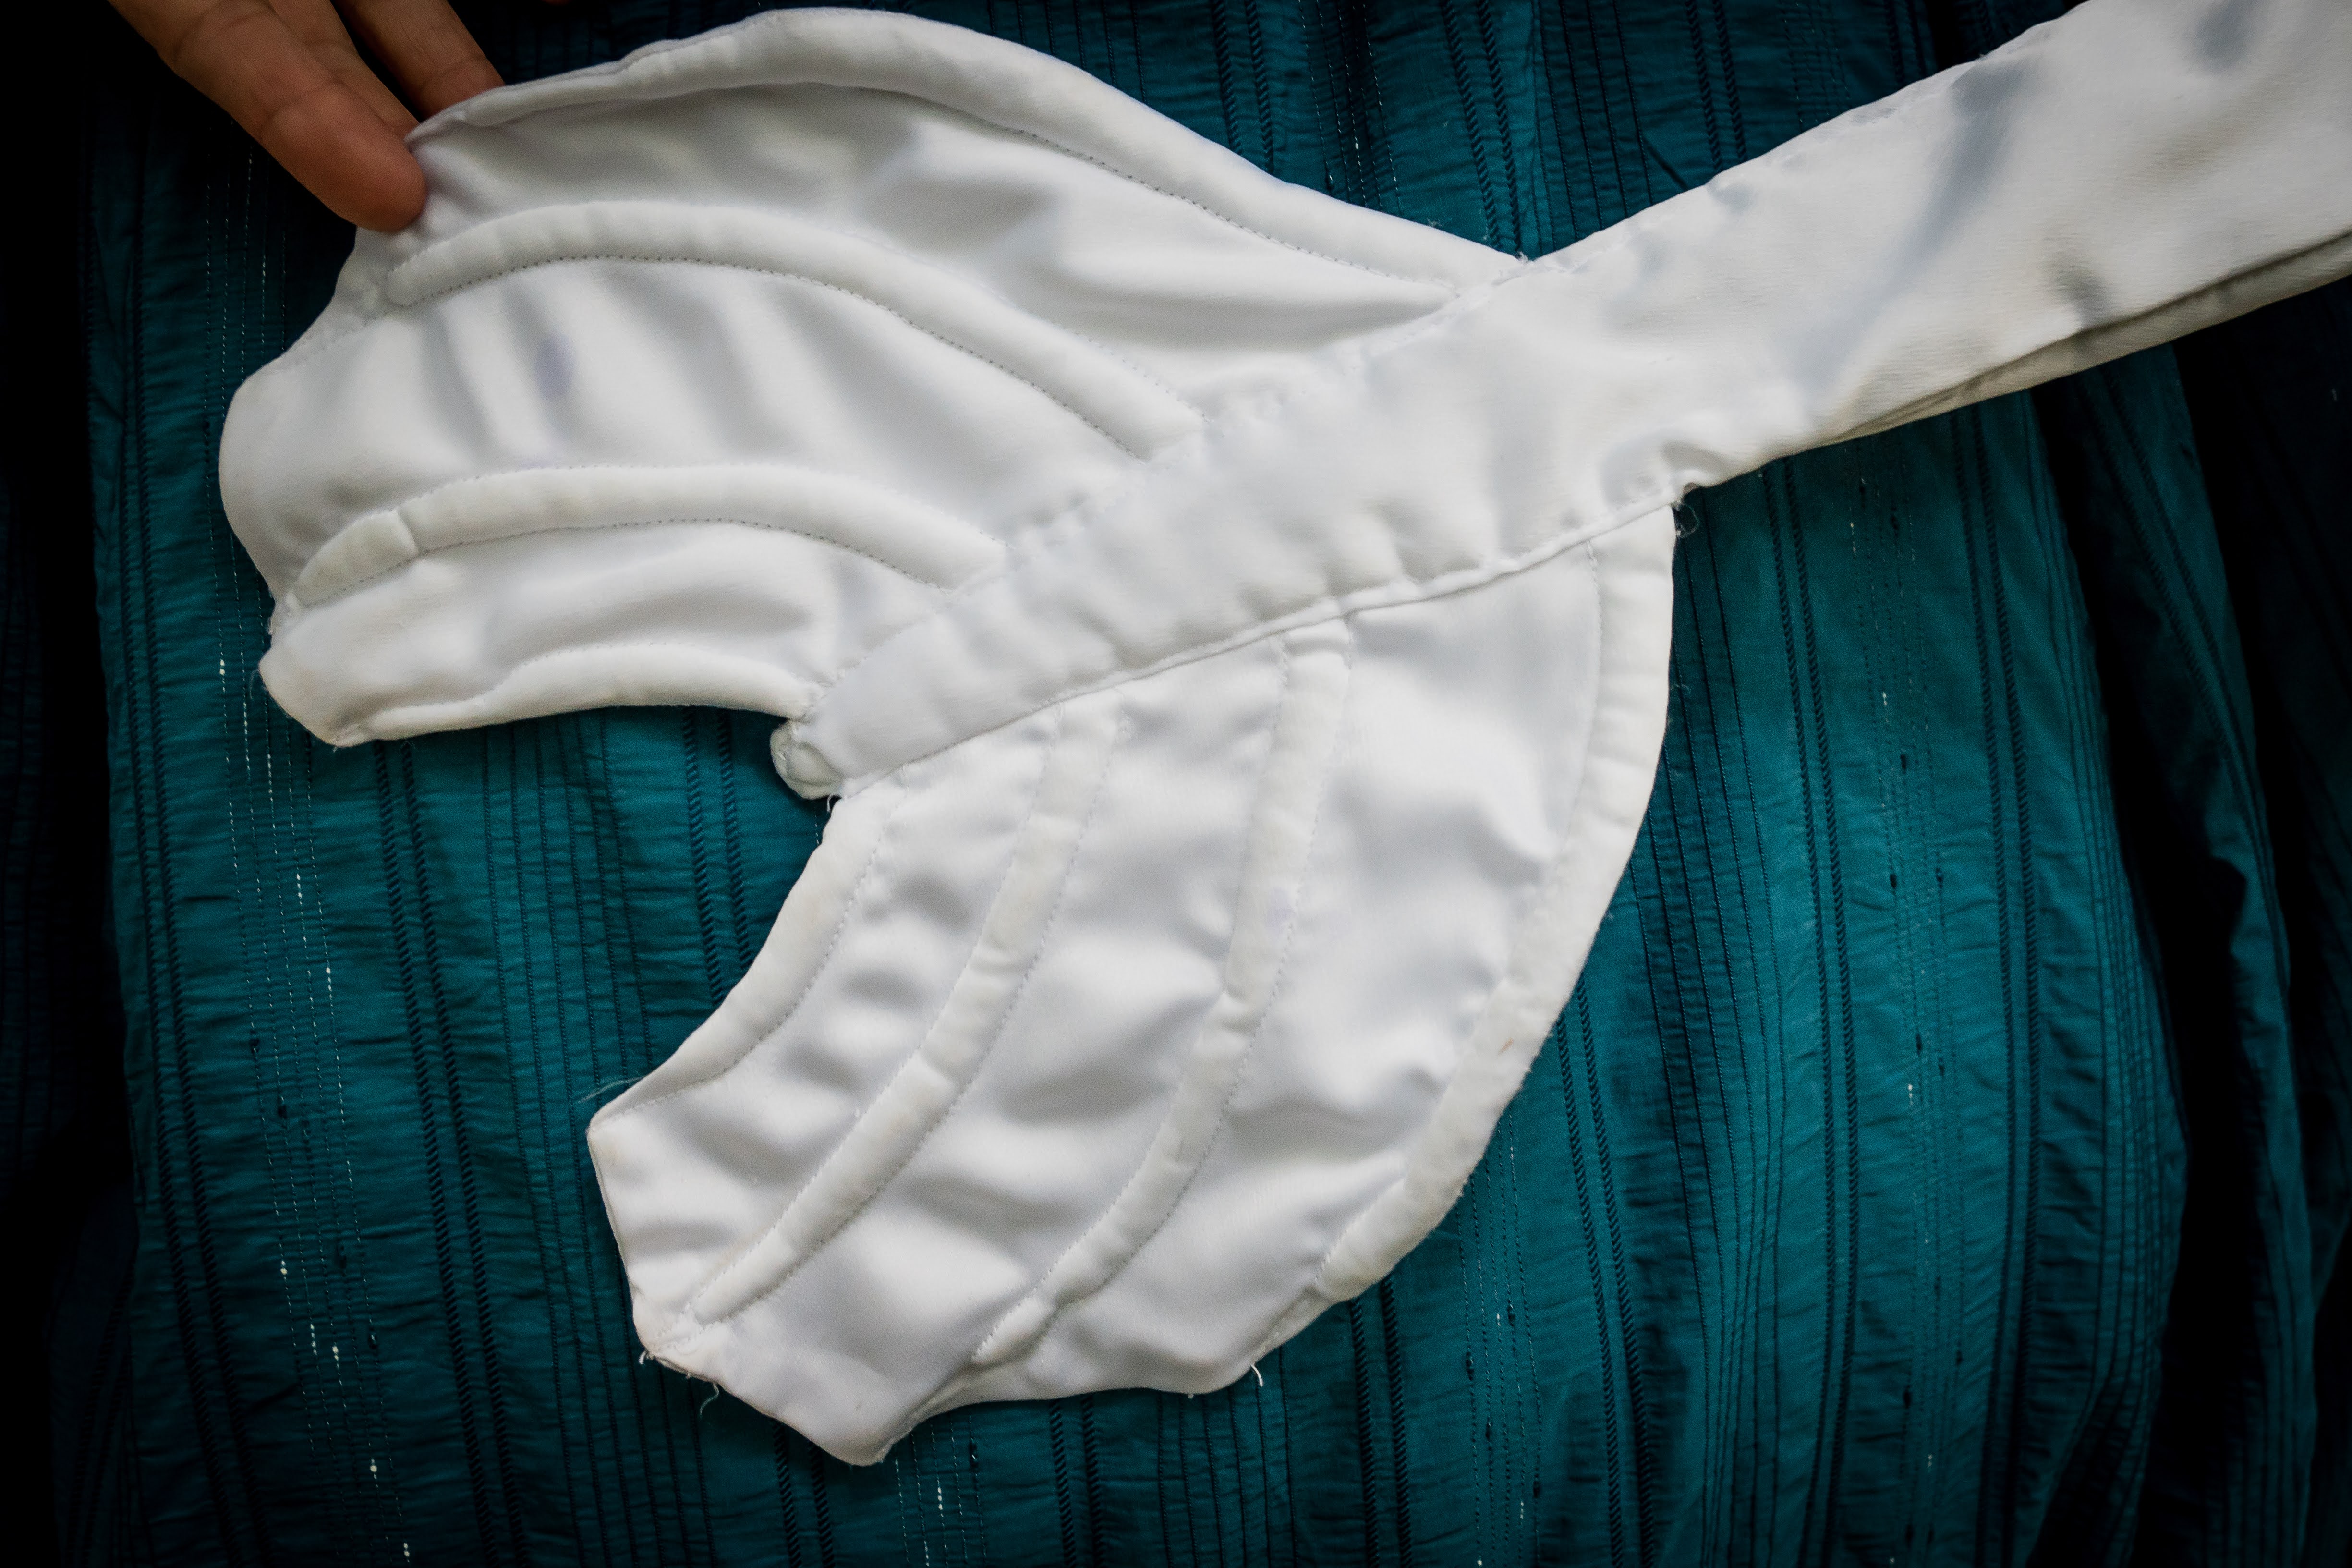
Sew the wings and your sleeve-halves together.

I can only recommend to you, to make the half of your sleeve in a jersey. Most of the time I’ve made it out of the same fabric like the rest of the costume, but once I didn’t have enough fabric for Liv’s white dragon (usually I use some cheap-er (poly) satin), but I had some jersey in the same colour. It seems to be more comfortable for Liv to wear, as it has some stretch.

You can sew on some ribbon or bias tape on the wings for the lines on the wings. If you’re in a hurry, you can also just paint them. I once made the mistake (on Liv’s white dragon, which was the very first one I did), where I also tried to stuff those ribbon lines. Boy, oh boy. It took me 3 days to stuff them all, as it was rather difficult to stuff them. (At least the end effect is good. But I didn’t take the time to do it this way since.)
Cover the wing edges with bias tape.
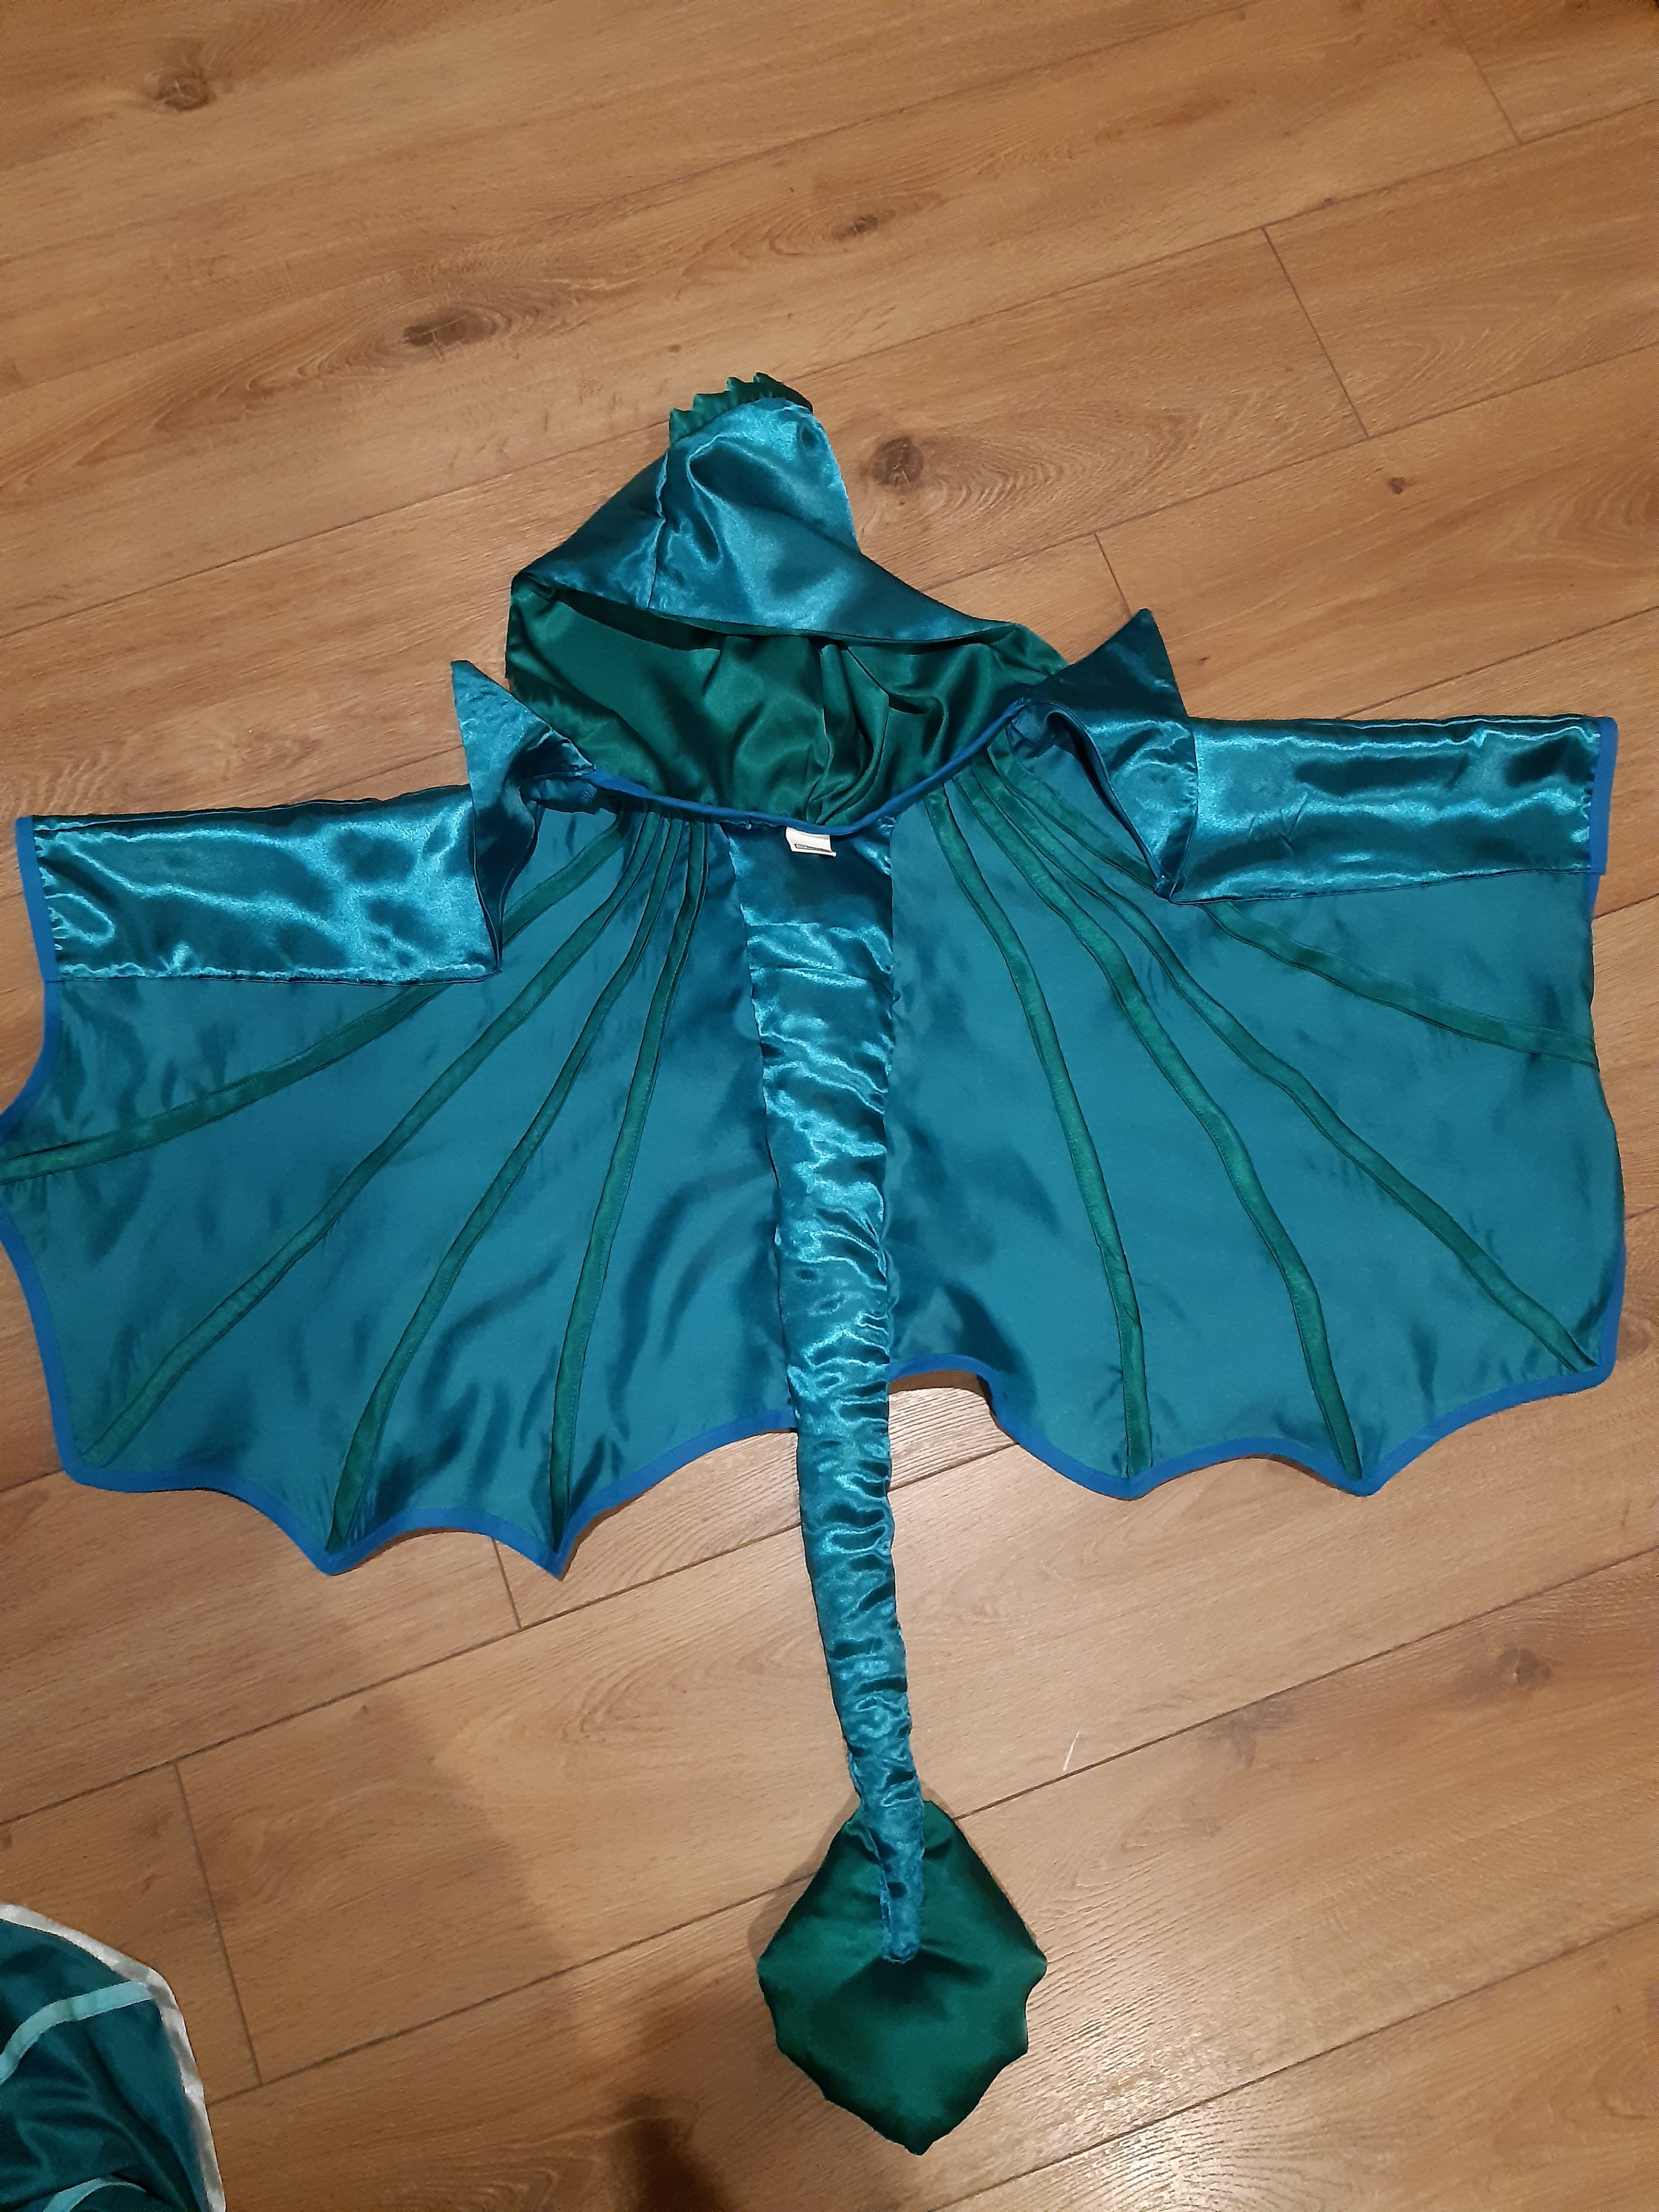
Make your tail end first. Here you can see the two different versions I made. Cut your desired tail end 2x. Sew it together, leaving an opening. Stuff your tail end.

Cut out the tail 2x. Sew together with the wings, putting the wings inside the edge of the tail. Also add your tail end in between the tail pieces at the bottom and sew it together. You can either do both sides at once on your machine, or if you are worried you will not catch all the right pieces, you can first make one side, then the other. Sometimes I do the second side by hand if I want it to be extra neat and I don’t want the sewing lines to show..


Stuff it from the opening left above (if you want).
Make a hood. I would cut one side from the top fabric and the inside again with the accent fabric colour. Looks more neat and nice if it is both sided, but it is not necessary. Before I sew the two halves of the upper hood together, I would first do the (stuffed) spikes and put them in between.

Or you can add a set of “ears” or whatever they are supposed to be, inspired by Light Fury, from How to Train Your Dragon 3.

Sew the hood together, and attach it to the body. You can add a bias tape over the seam to clean it up and make it nicer to wear, if you wish. If I do the long spikes on top of the greenish dragon, they are longer than the hood itself.

I then hand-sew it on top of the tail/back.
I know this is by far not a perfect tutorial or pattern. But maybe it helped (a little). Maybe not. I will try to do that tutorial soon-ish.. (not gonna make it before Halloween though, I’m afraid).
Have a nice week-end!

Thank you for generously showing how to make these dragon suits. My grand daughter wants one for Halloween, and she wants “to make something with her grandma”. Many Blessings to you!!!
LikeLike
Thank you! I am so glad somebody found it useful! :-) Hope you´ll have fun making those together!
LikeLike
hi! It’s so wonderful of you to share the process! Did you ever happen to share a pdf pattern pieces or perhaps measurements of the pieces you made? If not, no worries, but thought it was worth checking. These are lovely and I was thinking a cape would make a fun birthday present for a little friend of ours!:)
LikeLike
Hi Teresa,
Unfortunately, I have not… though, it has been on my mind for a long time now to make a (more) proper pattern out of it, but I can´t seem to get to do it.. what I usually do, though, is take a shirt in the size of the child, best if it has long sleeves, and trace that and kind of eye-ball it from there… hope that helps at least a little bit.
Feel free to share what you make, I´d love to see other versions of this! Good luck!
LikeLike